Fiscal Setup:
How To: - Setup Fiscals (Periods & Council Dates)
How To: - Setup Fiscals (Period Lockout)
How To: - Setup Fiscals (Default Period)
General Settings:
How To: - Descriptions (Category Types)
How To: - Setup Financial Institutions
How To: - Helpful Links
Financial Settings:
How To: - Cash or Accrual
How To: - Claims Setup
How To: - Descriptions (Vendor Groups)
How To: - Banking Services
How To: - ACH Administration
Posting:
How To: - Post Receipts
How To: - Post Invoices
How To: - Post Investment Sales
How To: - Post Investment Purchases
How To: - Post Transfers
How To: - Post To General Journal
How To: - Post Reinvested Interest
How To: - Budget Forecasting
Purchase Orders:
How To: - Create Purchase Orders
How To: - Purchase Order Approval
Banking Services:
How To: - Create a Reconciliation Statement
How To: - Manage Checks
How To: - Manage Deposits
How To: - Investment Purchases
How To: - Manage Investment Sales
How To: - Redeem Warrants
Forms:
How To: - Issue 1099's
How To: - Issue Payments
How To: - Reprint Payments
Data Center:
How To: - Manage Vendors
How To: - Manage Grants
Chart of Accounts:
How To: - Manage Fund Numbers
How To: - Manage BARS Account Numbers
How To: - Manage Funds Groups
Workshops:
How To: - Setup a Bank or Investment Account
How To: - Reconcile
Download a pdf How to Guide for
Vision Financials

Fiscal Setup:
How To: - Setup Fiscals (Periods & Council Dates)
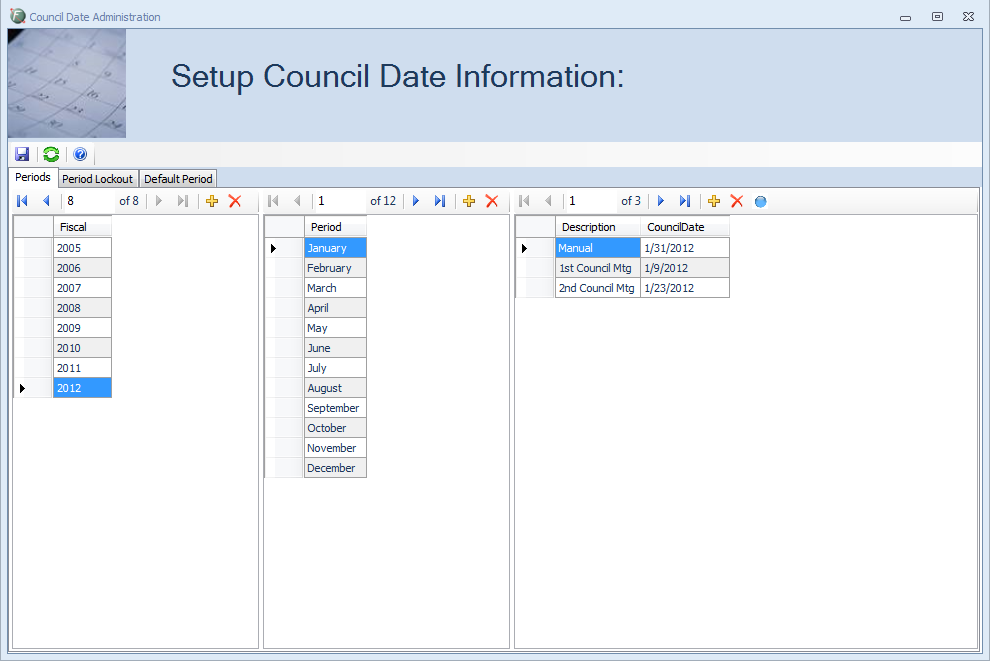
1) To begin, press the
Fiscal Setup Button in the upper-left hand corner of the Vision Financials homescreen.
2) Start by entering selecting the fiscal you wish to work with. If the desired fiscal is not there Click the
New Button directly above the fiscals and
then change the name to fit your needs.
3) Next click on the appropriate Period you wish to work with in the selected fiscal. If the desired Period is not there Click the
New Button directly
above the Period and then change the name to fit your needs.
4) Continue by clicking the
New Button in the Council Date area and renaming your new council date to whatever you need. (Also choose the
correct Council Date for association.)
5) Choose
Save and then Close.
How To: - Setup Fiscals (Period Lockout)
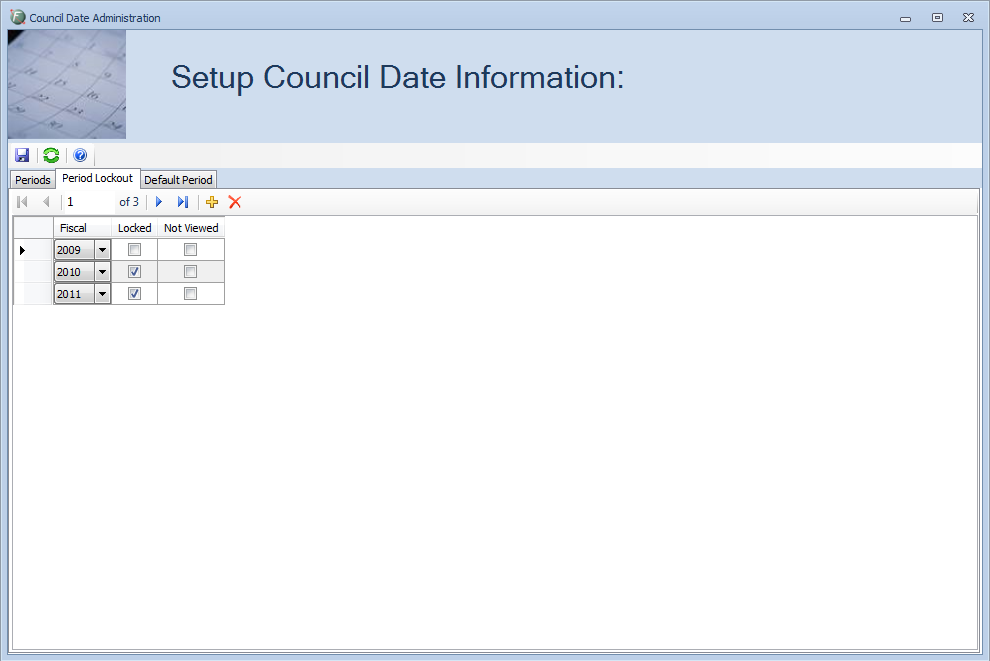
1) To begin, press the
Fiscal Setup Button in the upper-left hand corner of the Vision Financials homescreen.
2) First Click on the Period Lockout tab.
3) Start by entering selecting the
New Button to add a period lockout.
4) Next click on the drop down menu to choose a fiscal period you wish to lock.
5) Continue by choosing the check mark box under Locked and if you don't wish to view the period any longer, click on the check mark box under
Not Viewed.
6) Repeat Steps 1 - 3 to lock additional periods.
7) Choose
Save and then Close.
Box Explanation:
· Locked - Still viewable but you cannot post trasactions to it.
· Not Viewed - Can't see it in Reporting or Posting.
How To: - Setup Fiscals (Default Period)

1) To begin, press the
Fiscal Setup Button in the upper-left hand corner of the Vision Financials homescreen.
2) Select the Default Period tab.
3) Next click on the drop down menu to choose a fiscal period you wish to set as default.
4) Choose
Save and then Close.
General Settings:
How To: - Descriptions (Category Types)
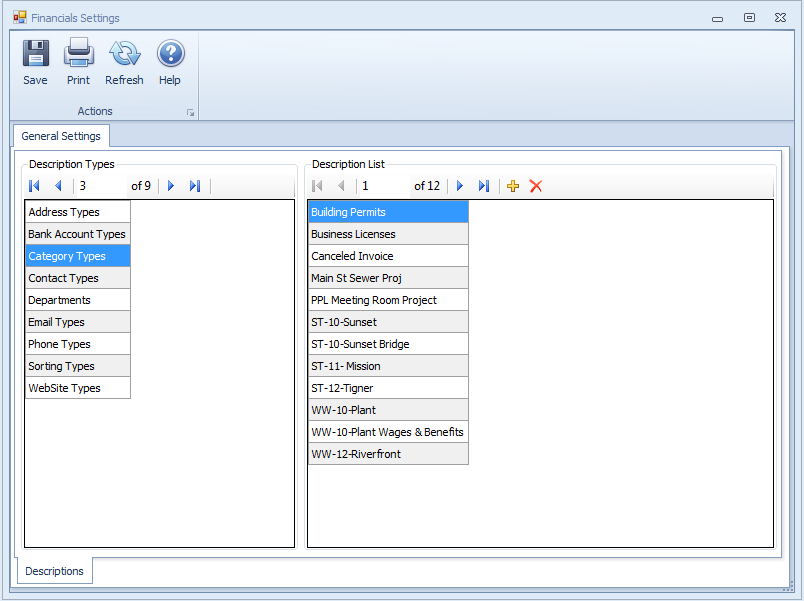
1) Begin by selecting the Description Type in the left Panel you wish to work with.
2) Choose from the Description List in the right panel to change an existing name or choose the
New Button to add a description.
3) Continue by typing in your preferred Description.
4) Choose
Save and close.
How To: - Setup Financial Institutions
How To: - Helpful Links
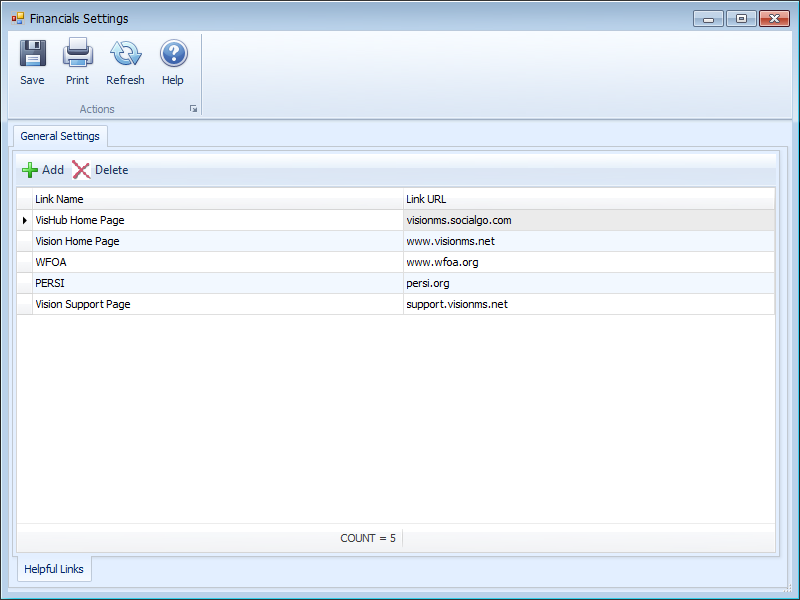
1) Begin by selecting the
Add button on the menu at the top of this screen.
2) Enter the Link Name and Link URL of your new website for Helpful Links.
3) If you wish to delete a Helpful Link, select it from the list and choose the
Delete Button.
4) Choose
Save and Close.
How To: - Cash or Accrual
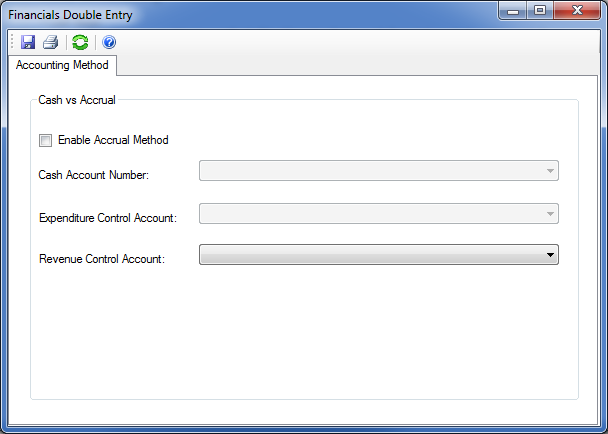
1) If you wish to operate as a double entry system, begin by clicking the Enable Accrual Method checkbox.
2) Choose the correct Cash Account Number, Expenditure Control Account, and Revenue Control Account from the appropriate drop down
selection menus.
3) Choose
Save and Close.
How To: - Claims Setup
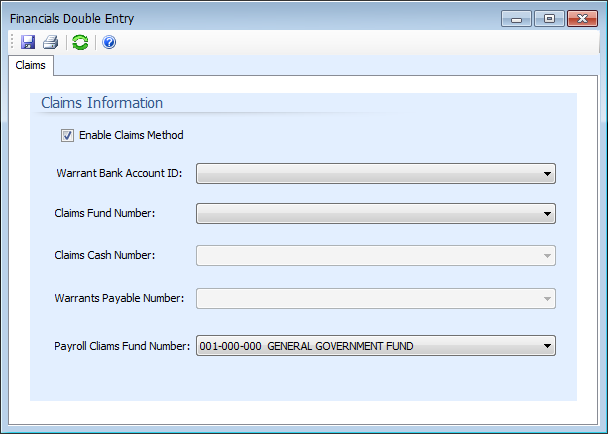
1) To Setup a Claims Fund, begin by clicking the Enable Claims Method checkbox.
2) Choose the correct Warrant Bank Account ID, Claims Fund Number, Claims Cash Number, Warrants Payable Number, and
Payroll Claims Fund number from the appropriate drop down selection menus.
3) Choose
Save and close.
How To: - Descriptions (Vendor Groups)
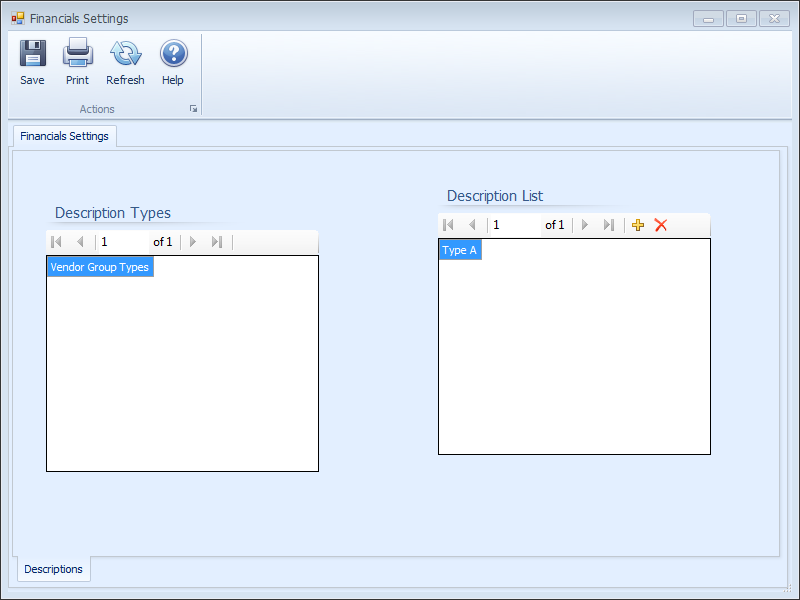
1) Begin by selecting the
New Button on the top Menu
2) Continue by typing in your desired Vendor Group type in the supplied field and hit the Tab when done.
3) If you wish do delete a created Vendor Group type, select it on the right and choose
Delete at the top of the screen.
4) Choose
Save and close.
How To: - Banking Services
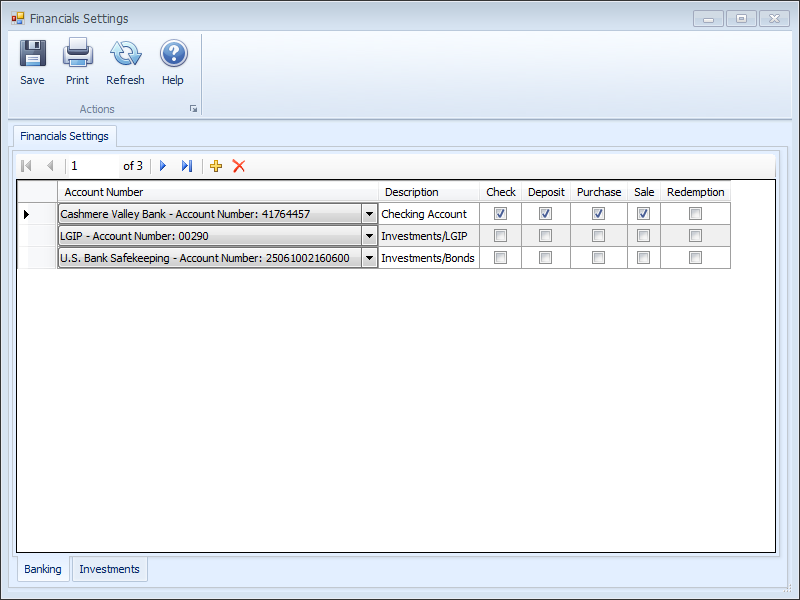
How To: - ACH Administration
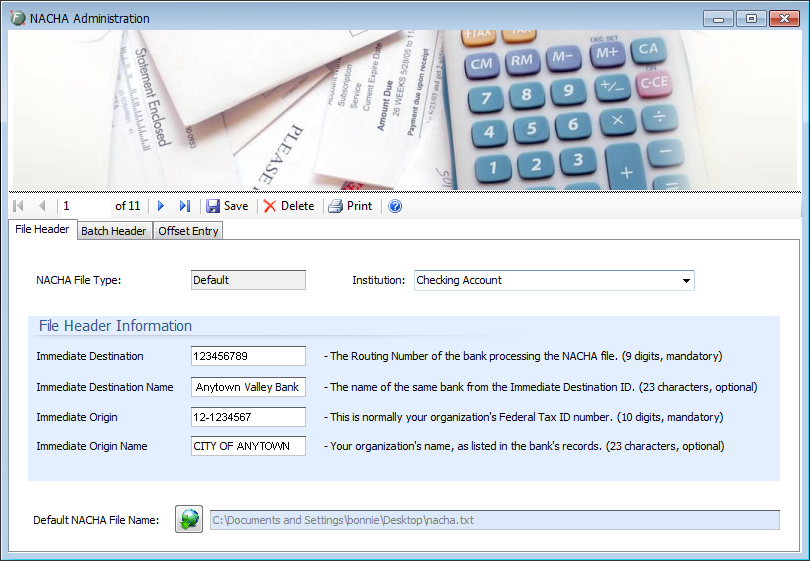
1) To setup NACHA, begin by Entering the correct Institution NACHA will be pulling funds from.
2) 2) Continue by entering File Head information provided by your Banking Institution
Note: All fields with "Mandatory" are required.
3) Next choose the

button to select the save file location and name for the NACHA run file for upload.

4) Continue by clicking the Batch Header information tab.
5) Enter your Batch Header information provided by your Banking institution.
6) Last, click on the Offset Entry tab at the top of your screen and enter your offset record if your bank requires one.
7) Click
Save and Close
· When setting up NACHA, it is recommended that this be done with a member of Vision Support Staff.
How To: - Post Receipts
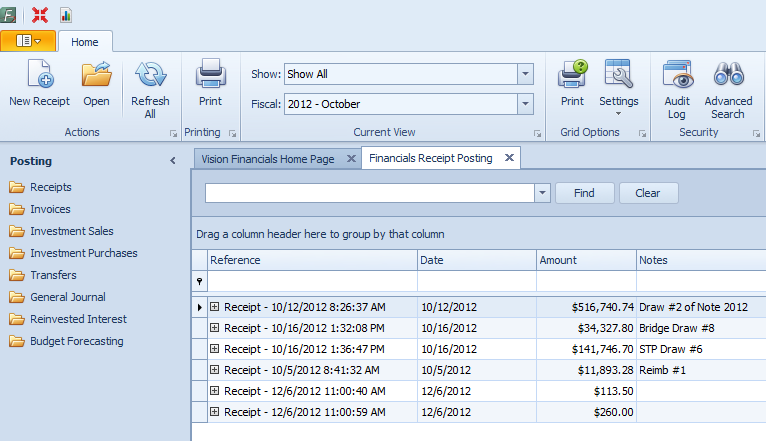
1) Begin by pressing the
New Receipt Button in the upper-left hand corner of the receipt posting home page.
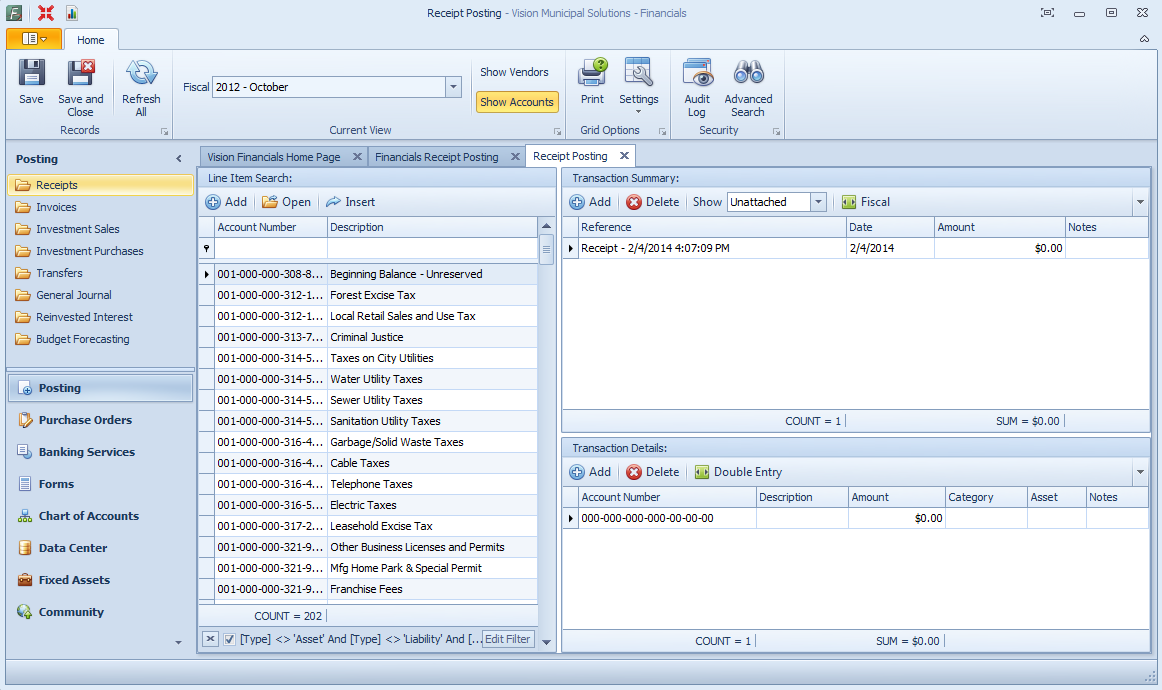
2) Press the
Add Button in the Transaction Summary group box to create a new receipt transaction.
3) Enter a Transaction
Reference, (Receipt Number) Date, and any relevant
Notes.
Note: (The amount column will automatically calculate as Transaction Detail records are added)
4) Continue by clicking the
Add Button in the Transaction Details group and either type in a COA line item or make your selection from within the
Line Item Search group (Double Click or Select and Move).
5) Enter the
Amount,
Category, and any relevant
Notes.
6) Finally, press the
Save or
Save and Close button to complete the process.
How To: - Post Invoices
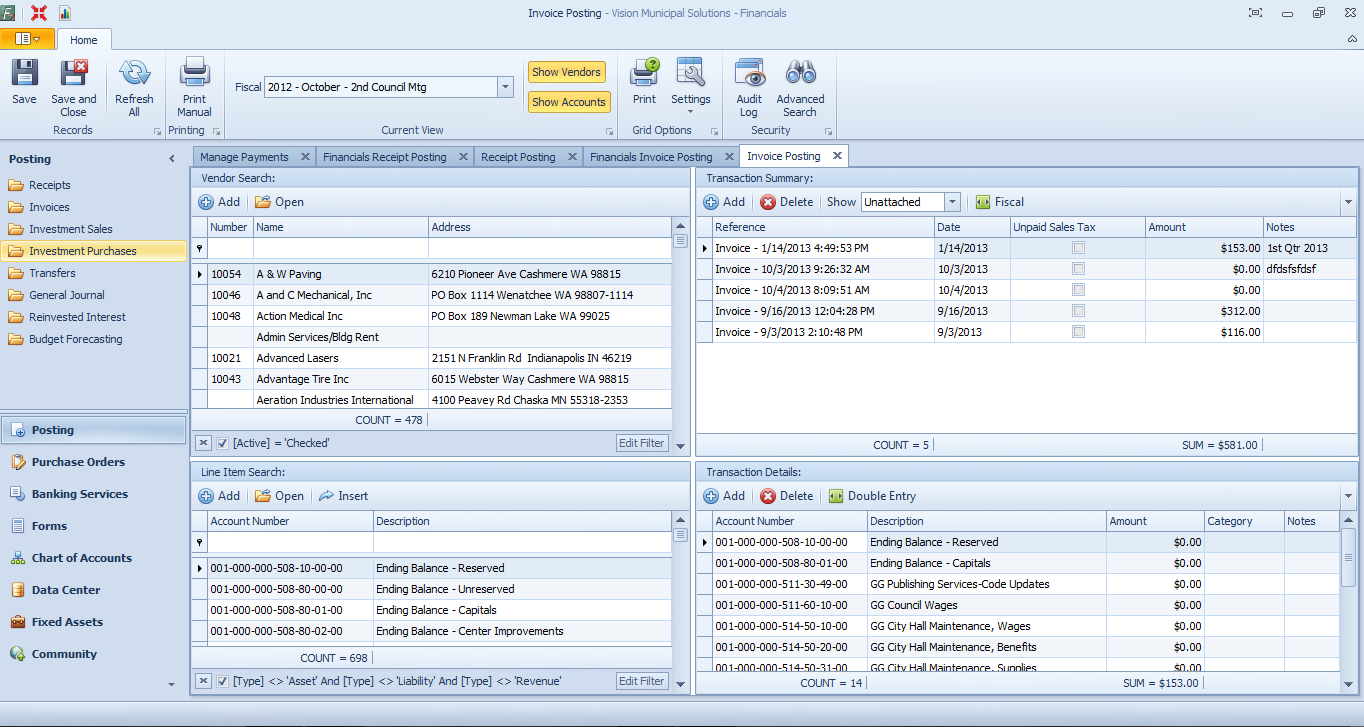
1) Begin by pressing the
New Invoice Button in the upper-left hand corner of the invoice posting home page..
2) Press the
Add Button in the Transaction Summary group box to create a new Invoice transaction.
3) Enter a Transaction
Reference (Invoice Number), Date, Unpaid Sales Tax and any relevant
Notes.
Note: (The amount column will automatically calculate as Transaction Detail records are added)
4) Continue by clicking the
Add Button in the Transaction Details group and either type in a COA line item or make your selection from within the
Line Item Search group (Double Click or Select and Move).
5) Enter the
Amount,
Category, and any relevant
Notes.
6) Finally, press the
Save or
Save and Close button to complete the process.
How To: - Post Investment Sales
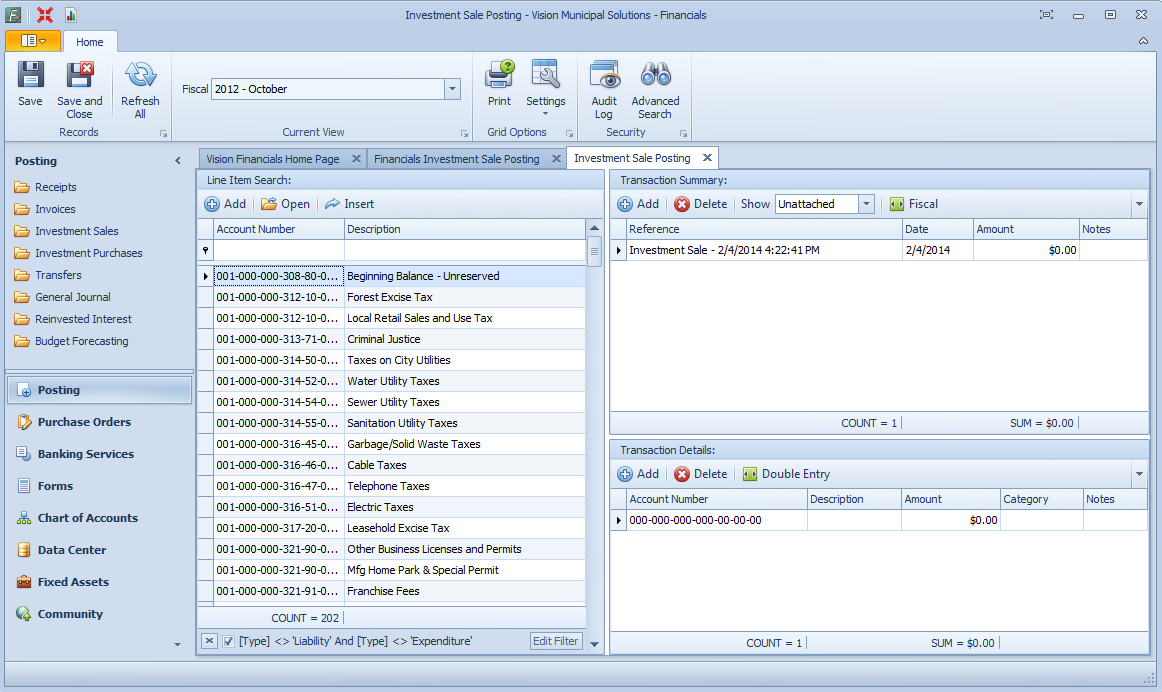
1) Begin by pressing the
New Investment Sale Button in the upper-left hand corner of the Investment Sales posting home page.
2) Press the
Add Button in the Transaction Summary group box to create a new Investment Sales transaction.
3) Enter a Transaction
Reference (Investment Sales Number),
Date, and any relevant
Notes.
Note: (The amount column will automatically calculate as Transaction Detail records are added)
4) Continue by clicking the
Add Button in the Transaction Details group and either type in a COA line item or make your selection from within the
Line Item Search group (Double Click or Select and Move).
5) Enter the
Amount,
Category, and any relevant
Notes.
6) Finally, press the
Save or
Save and Close button to complete the process.
How To: - Post Investment Purchases
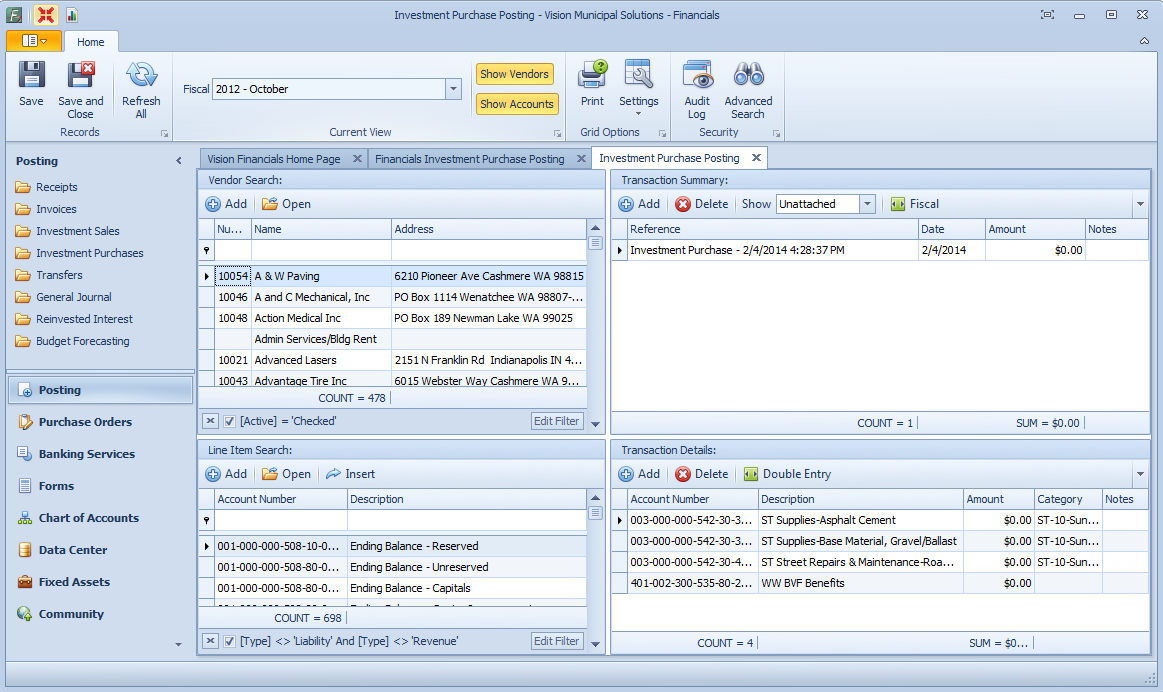
1) Begin by pressing the
New Investment Purchase Button in the upper-left hand corner of the Investment Sales posting home page.
2) Press the
Add Button in the Transaction Summary group box to create a new Investment Purchase transaction.
3) Enter a Transaction
Reference (Investment Number),
Date, and any relevant
Notes.
Note: (The amount column will automatically calculate as Transaction Detail records are added)
4) Continue by clicking the
Add Button in the Transaction Details group and either type in a COA line item or make your selection from within the
Line Item Search group (Double Click or Select and Move).
5) Enter the
Amount,
Category, and any relevant
Notes.
6) Finally, press the
Save or
Save and Close button to complete the process.
How To: - Post Transfers
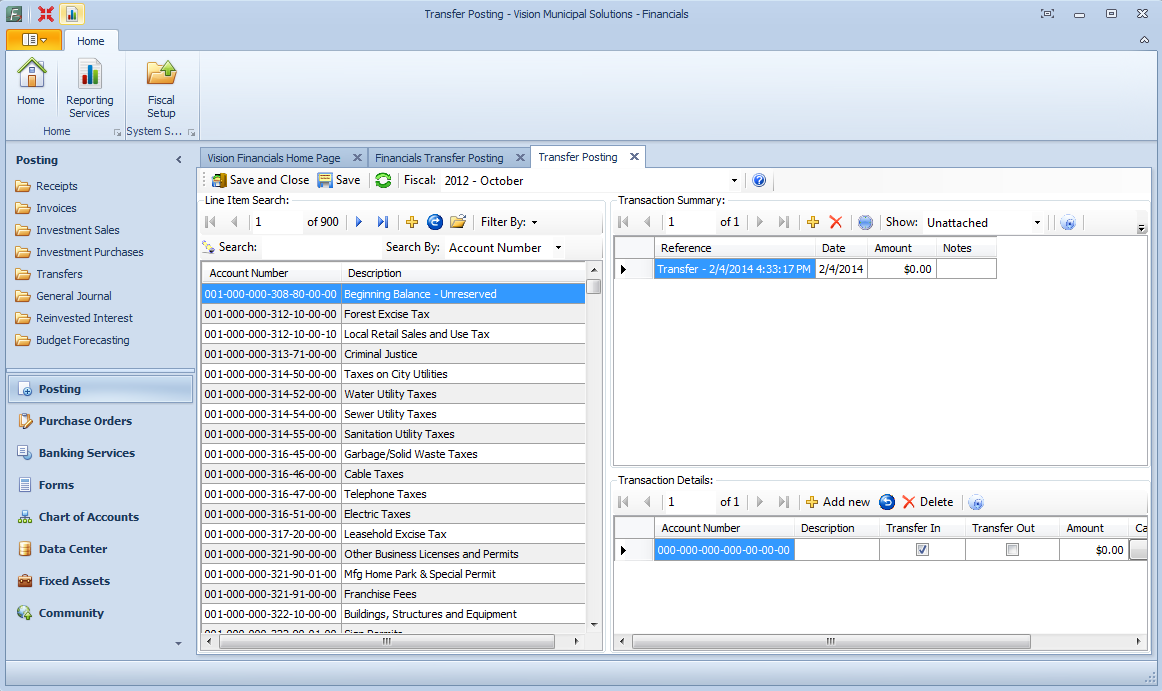
1) Begin by pressing the
New Transfer Button in the upper-left hand corner of the Investment Sales posting home page.
2) Press the
Add Button in the Transaction Summary group box to create a new Transfer transaction.
3) Enter a Transaction
Reference (Transfer Number),
Date, and any relevant
Notes.
Note: (The amount column will automatically calculate as Transaction Detail records are added)
4) Continue by clicking the
Add New Button in the Transaction Details group and either type in a COA line item or make your selection from within the
Line Item Search group (Double Click or Select and Move).
5) Enter the
Amount,
Transfer In or Transfer Out,
Category, and any relevant
Notes.
6) Finally, press the
Save or
Save and Close button to complete the process.
How To: - Post To General Journal
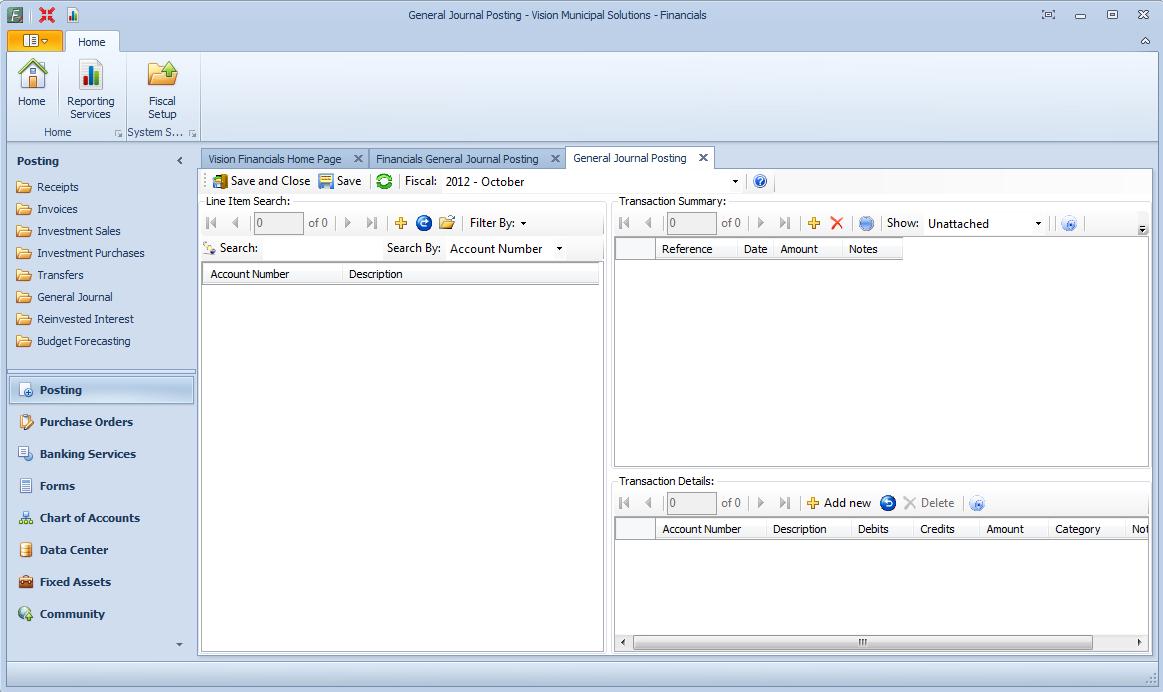
1) Begin by pressing the
New General Journal Button in the upper-left hand corner of the Investment Sales posting home page.
2) Press the
Add Button in the Transaction Summary group box to create a new General Journal transaction.
3) Enter a Transaction
Reference (G/L Reference),
Date, and any relevant
Notes.
Note: (The amount column will automatically calculate as Transaction Detail records are added)
4) Continue by clicking the
Add New Button in the Transaction Details group and either type in a COA line item or make your selection from within the
Line Item Search group (Double Click or Select and Move).
5) Enter the
Debits or Credits, Amount,
Category, and any relevant
Notes.
6) Finally, press the
Save or
Save and Close button to complete the process.
How To: - Post Reinvested Interest
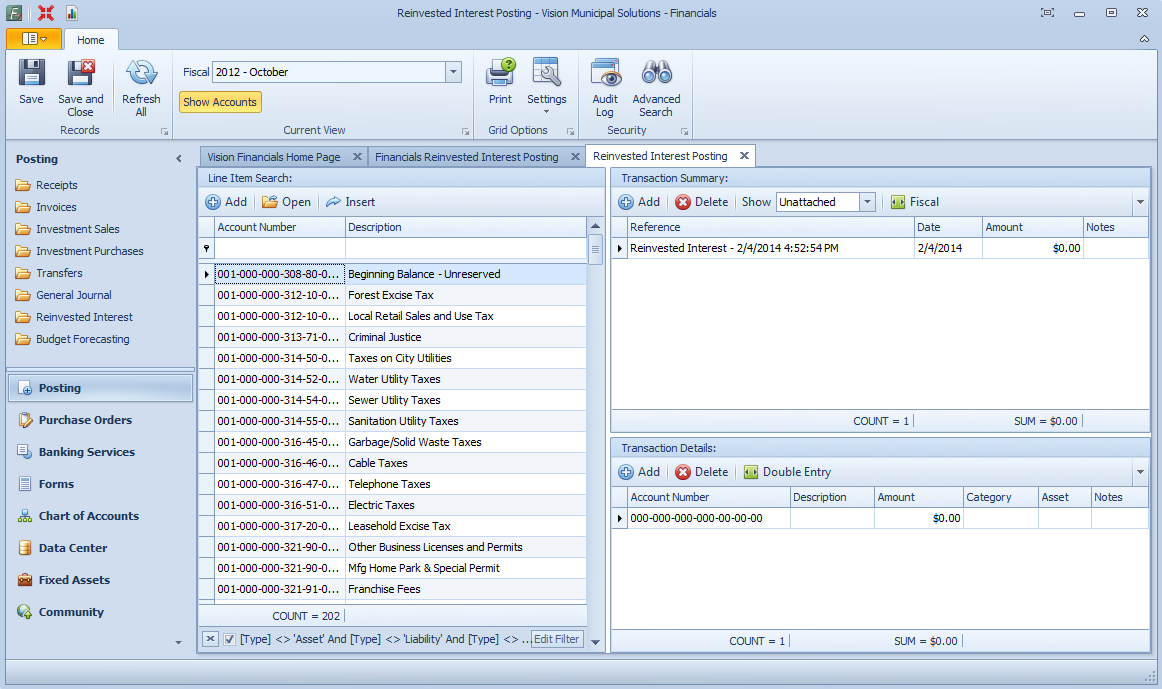
1) Begin by pressing the
New Reinvested Interest Button in the upper-left hand corner of the Investment Sales posting home page.
2) Press the
Add Button in the Transaction Summary group box to create a new Reinvested Interest transaction.
3) Enter a Transaction
Reference,
Date, and any relevant
Notes.
Note: (The amount column will automatically calculate as Transaction Detail records are added)
4) Continue by clicking the
Add New Button in the Transaction Details group and either type in a COA line item or make your selection from within the
Line Item Search group (Double Click or Select and Move).
5) Enter the
Amount,
Category, and any relevant
Notes.
6) This entry will create both the Receipt and Investment purchase for you. Now you may complete the transaction by depositing the interest into your
desired Financial Institution.
7) Finally, press the
Save or
Save and Close button to complete the process.
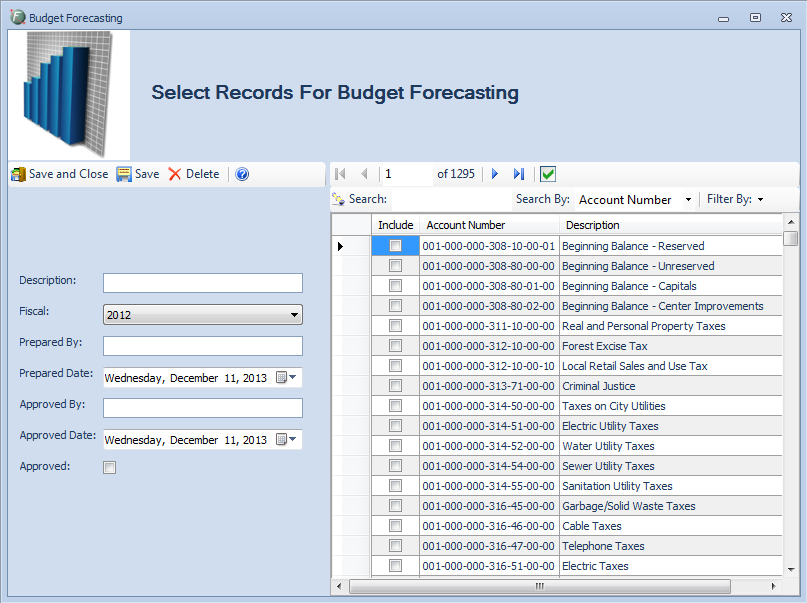
How To: - Budget Forecasting
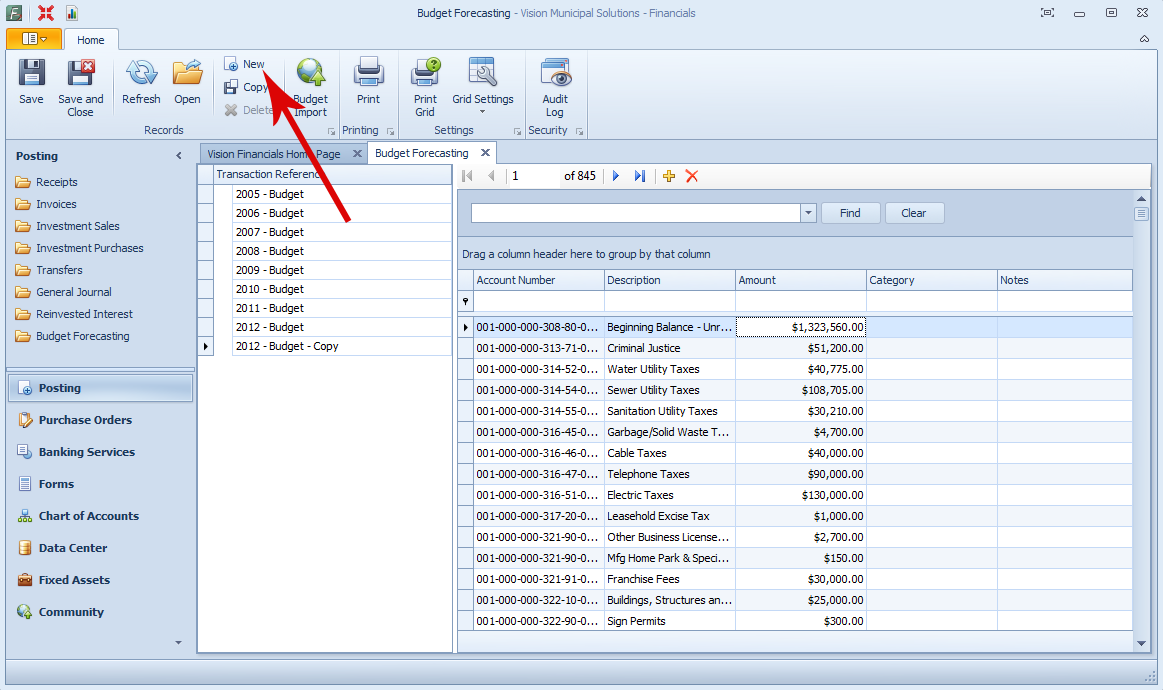
1) Begin by selecting the
New Button in the top task bar.
2) Enter your Description, Fiscal, and other relevant information.
3) Continue by select the BARS numbers you want to participate in the budget.
4) Choose
Save and Close.
Purchase Orders:
How To: - Create Purchase Orders

1) Begin by pressing the
New Button in the upper-left hand corner of the Purchase Order Center.
2) Choose the appropriate
Vendor,
Fiscal, and
Posting Date and enter a
Purchase Order Number and
Reference in the Purchase Order Number Box.
3) Press the
Add Button in the Purchase Order Details Box and select an
Account Number,
Category,
Amount and relevant
Notes.
4) Be sure to press
Save,
Save and Close or
Save and New before closing the Purchase Order Manager.
How To: - Purchase Order Approval
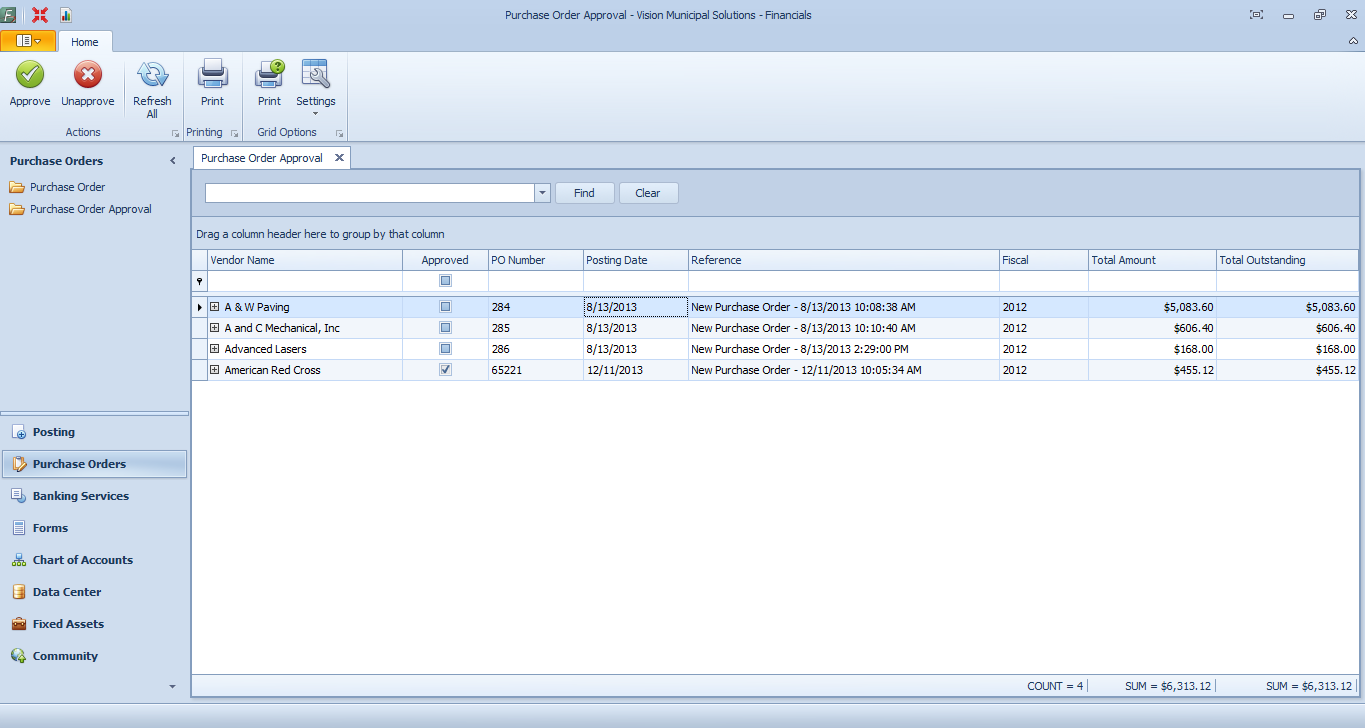
1) Begin by selecting the Purchase Order to be Approved or Unapproved.
2) Press the
Approve or
Unapprove Button in the upper-left hand corner of the page.
3) You can also double click on an existing Purchase Order to edit it.
Banking Services:
How To: - Create a Reconciliation Statement
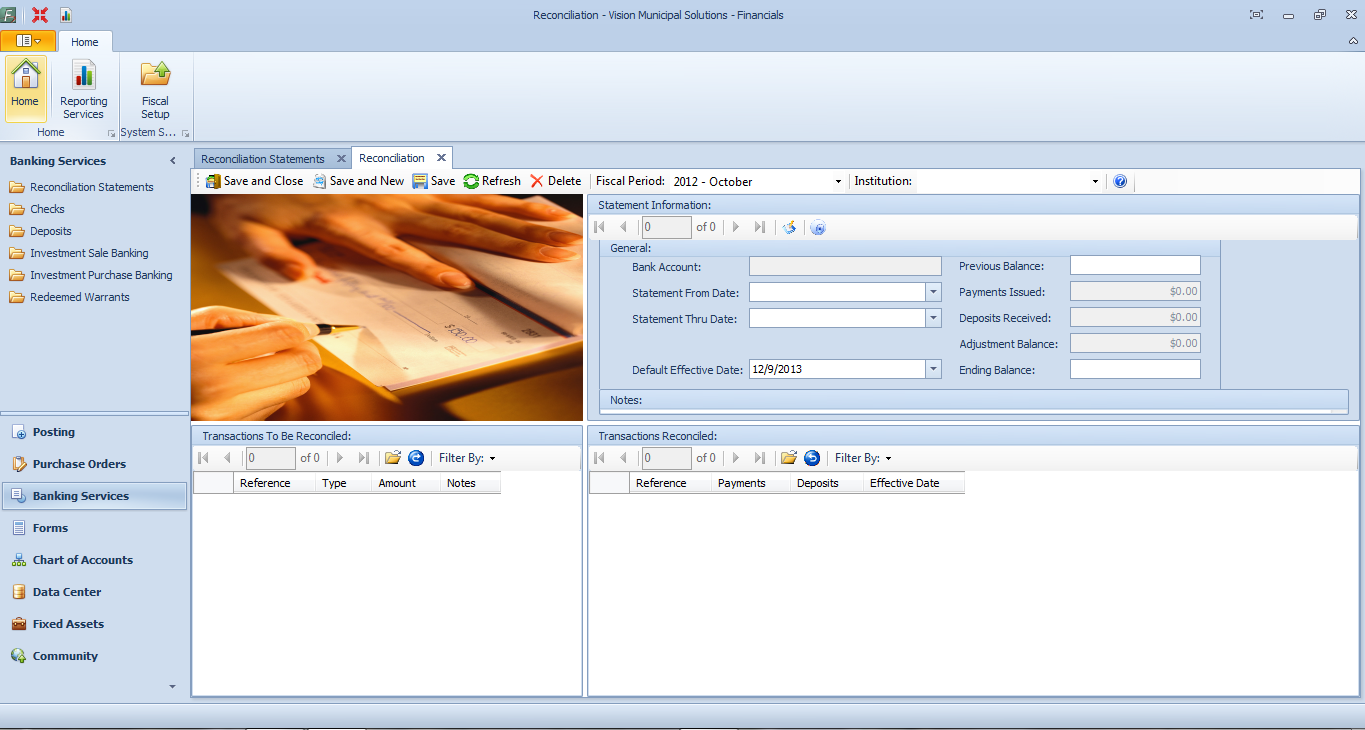
1) Begin by pressing the
New Button in the upper left-hand corner of the Reconciliation Statements home page.
2) Begin by Selecting the desired
Fiscal Period and
Institution in the Fiscal and Institution Combo Box and select YES to Create Reconciliation
Statement.
3) Enter any relevant
Notes such as
Account Reference,
Date, Etc. for the Transactions To Be Reconciled.
4) Continue by choosing the check mark box under Locked and if you don’t wish to view the period any longer,
click on the check mark box under Not Viewed.
5) Repeat Steps 1 – 3 to lock additional periods.
6) Choose
Save and then close.
How To: - Manage Checks
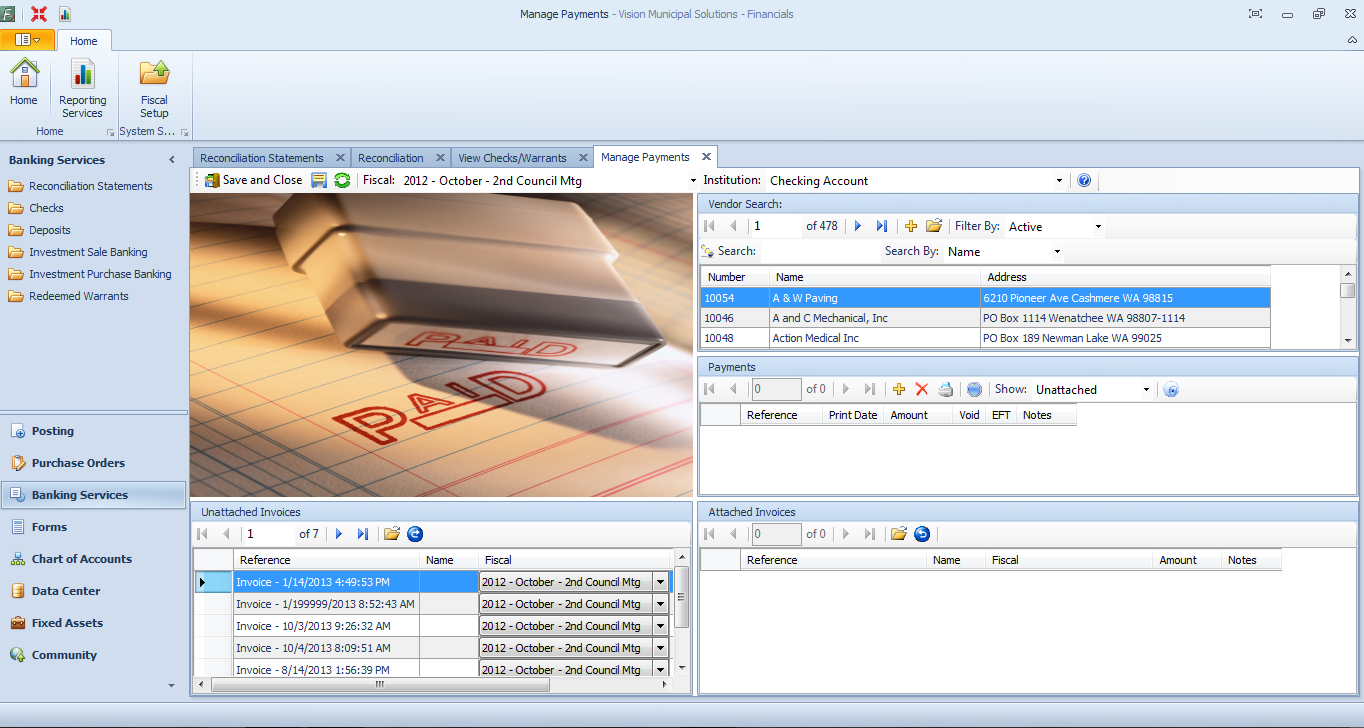
1) Begin by pressing the
New Button in the upper-left hand corner of the Checks homepage.
2) Select the desired
Fiscal and
Institution.
3) Next press the
New Button in the Payments group box to create a new Payment.
4) Enter Payment Account
Reference,
Date, and any relevant
Notes.
Note: (The amount column will automatically calculate as Transaction Detail records are added)
5) Continue by Attaching the
Unattached Invoices by double clicking the Invoice or simply select the Invoice and use the Blue Attached Selection
button to attach the Invoice to the Payment.
6) Enter the
Amount,
Category and any relevant
Notes.
7) Finally, press the
Save or
Save and Close button to complete the process.
How To: - Manage Deposits
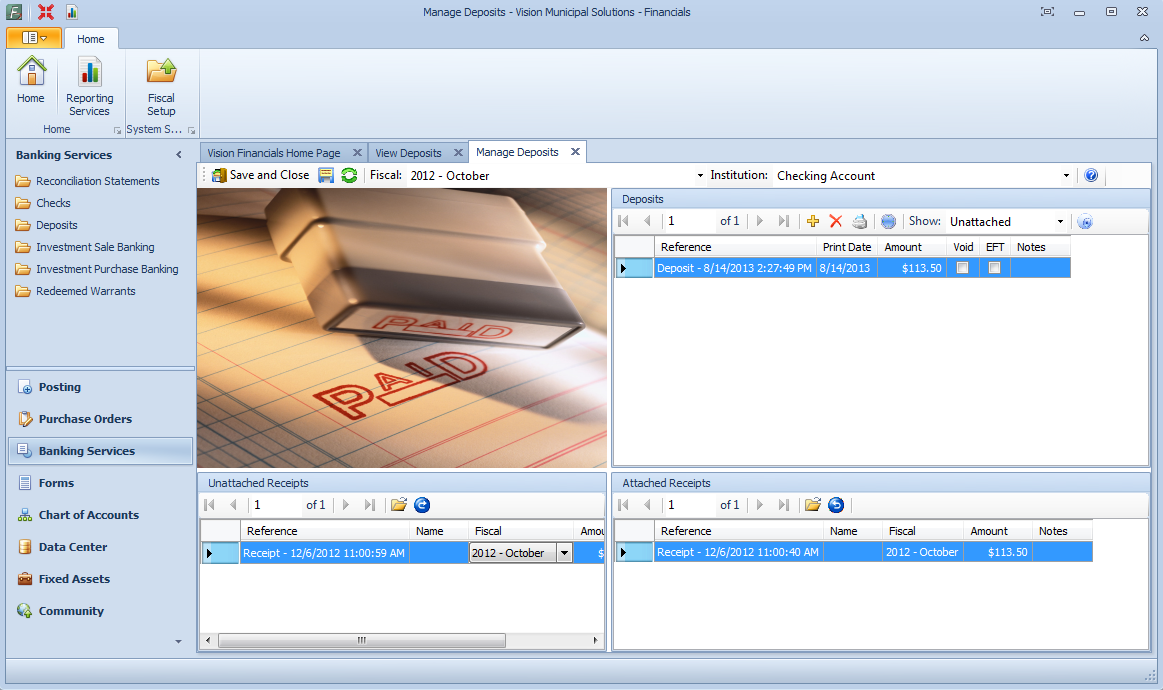
1) Begin by pressing the
New Button in the upper-left hand corner of the Deposits homepage.
2) Select the correct
Fiscal Date and
Institution in Boxes above.
3) Enter an Investment Account
Reference,
Date, and any relevant
Notes.
Note: (The amount column will automatically calculate as Transaction Detail records are added)
4) Continue by clicking the
New Button in the Deposits Box group and enter Account Reference, Date, and or any relevant Notes.
5) Next Attach the
Unattached Receipts to the Deposit by double clicking it or by selecting it and moving it over with the Blue Attached Selection Button.
6) Finally, press the
Save or
Save and Close button to complete the process.
How To: - Investment Purchases
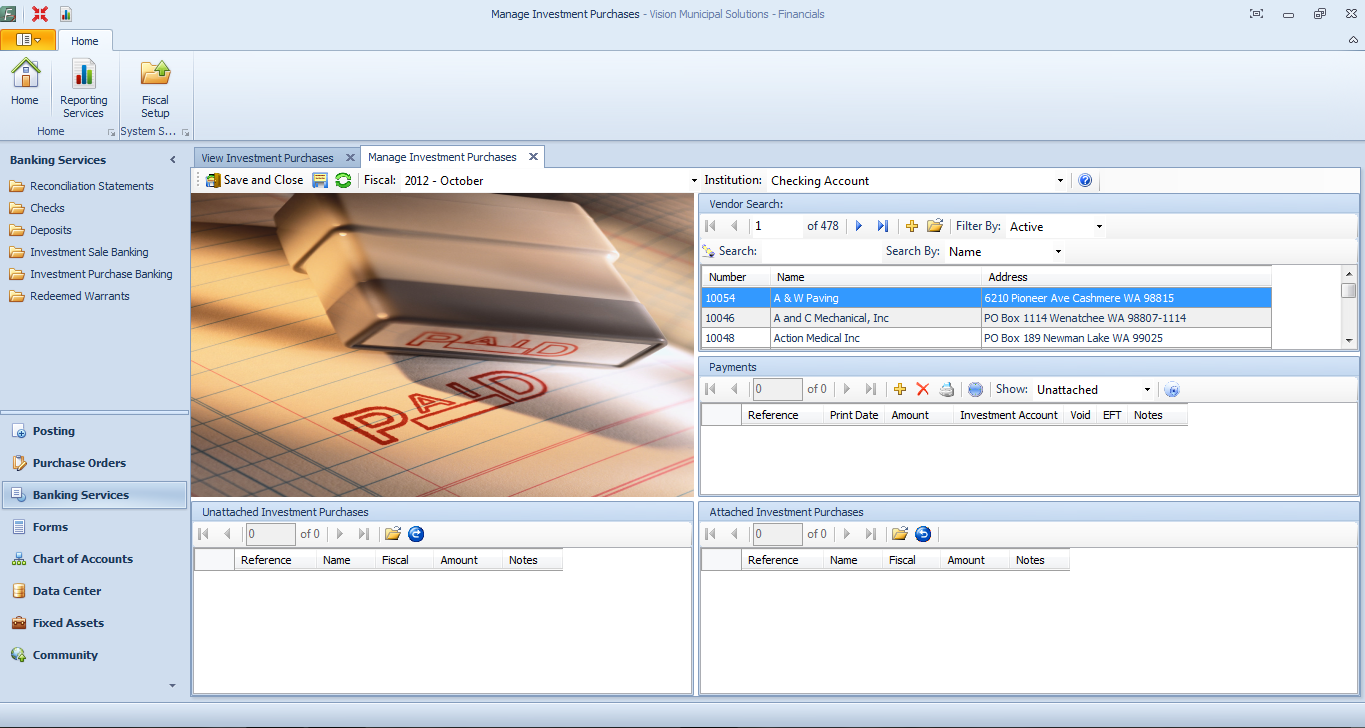
1) Begin by pressing the
New Button in the upper-left hand corner of the Investment Purchase Banking homepage.
2) Select the correct
Fiscal Date and
Institution in Boxes above.
3) Enter an Investment Account Reference, Date, and any relevant Notes.
Note: (The amount column will automatically calculate as Transaction Detail records are added)
Note: (The Institution is where the transaction comes from and the Investment Account is where it ends)
4) Continue by clicking the
New Button in the Payments Details Box
5) Enter the
Amount,
Category and any relevant
Notes.
6) Next Attach the
Unattached Investment Receipts to the Payments by double clicking it or by selecting it and moving it over with the Blue Attached
Selection Button.
7) Finally, press the
Save or
Save and Close button to complete the process.
How To: - Manage Investment Sales
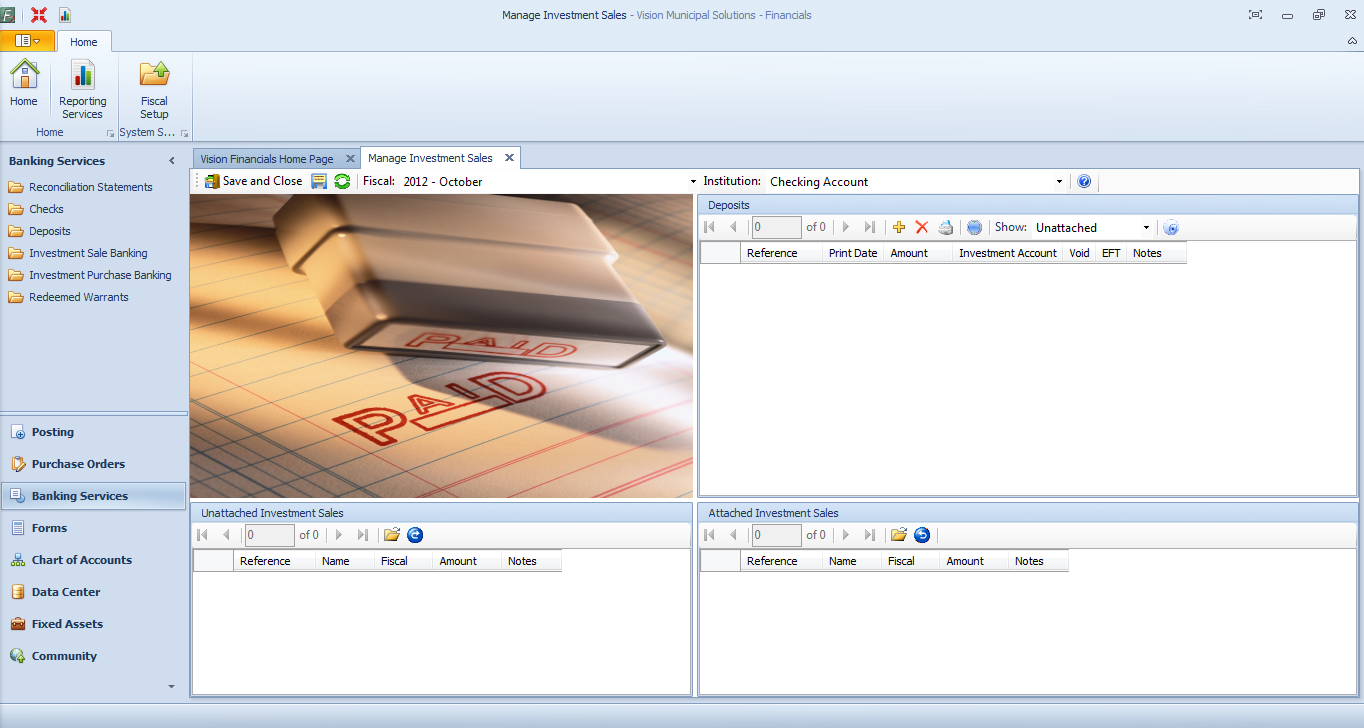
1) Begin by pressing the
New Button in the upper-left hand corner of the Investment Sale Banking homepage.
2) Select the correct
Fiscal Date and
Institution in Boxes above.
3) Continue by clicking the New Button in the Deposits Detail Box and Enter Reference, Date, and any relevant Notes. Also choose the correct
Investment Account.
Note: (The Institution is where the transaction is deposited and the Investment Account is where it withdrawn from)
4) Next Attach the
Unattached Investment Sales to the Deposits by double clicking it or by selecting it and moving it over with the Blue Attached
Selection Button.
5) Finally, press the
Save or
Save and Close button to complete the process
How To: - Redeem Warrants

1) Begin by pressing the
New Button in the upper-left hand corner of the Redeemed Warrents homepage.
2) Select the correct
Fiscal Date and
Institution (checking account used to redeem your warrants) in Boxes above.
3) Continue by clicking the
New Button in the Checks Detail Box and Enter
Reference (check number),
Date, and any relevant
Notes. This creates
the actual check (EFT) that redeems the warrants.
4) Next Attach the
Unredeemed Warrants to the Checks by double clicking it or by selecting it and moving it over with the Blue Attached Selection
Button.
5) Finally, press the
Save or
Save and Close button to complete the process.
Forms:
How To: - Issue 1099's

1) Begin by Verifying that the
Fiscal Period is Correct.
2) Enter the
Minimum Balance amount.
3) 3) Press "
RUN" to complete the process
4) Next, confirm that the
Payee information is Correct and then Proceed to the Next Step.
How To: - Issue Payments
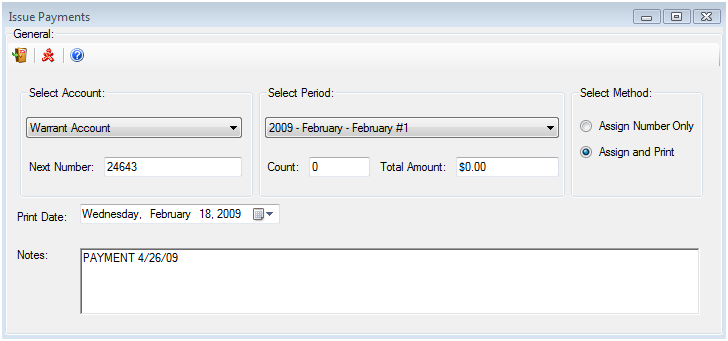
1) Begin by Selecting the Appropriate Account located in the Select Account Box.
2) Next, confirm that the Period is Accurate.
3) Continue by Selecting the
Method in the Select Method Box.
4) Enter the
Print Date and any relevant
Notes.
5) Finally, Select
Run
How To: - Reprint Payments
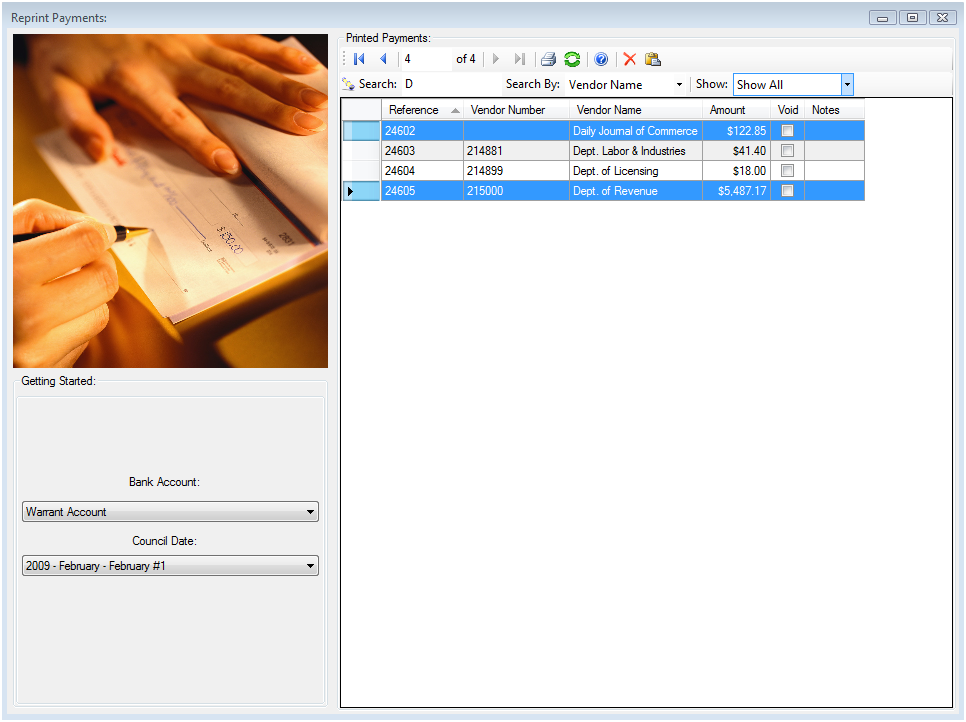
1) Begin by Selecting the Correct
Bank Account and
Council Date.
2) Search for Vendor by Reference, Vendor Number, Vendor Name or Amount.
3) You can also narrow the Search by Viewing Attached, Unattached or Show All.
4) When you have selected the desired item to Print Select it and click the Print Button.
Data Center:
How To: - Manage Vendors
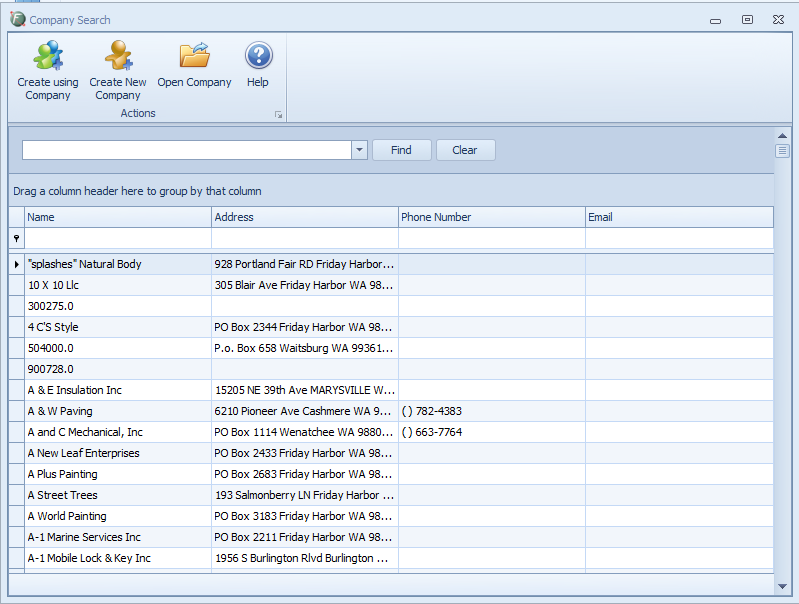
1) Begin by pressing the
New Vendor Button in the upper-left hand corner of the Vendor Center homepage.
2) You can also double click any Vendor to edit information within an existing record.
3) Select
Create New Company for a completely new vendor or Create Using Company to start with a pre-existing vendor.
4) After Entering the vendor information be sure to press the
Save or
Save and Close button to complete the process.
How To: - Manage Grants

1) Begin by pressing the
New Button in the upper-left hand corner of the Grant Cener homepage.
2) You can also double click any Grant to edit information within an existing record.
Note: If you wish to track transactions in relation to this grant, create a Category first. Then select the appropriate category on the Categories tab.
(pictured below)
3) After Entering the grant information be sure to press the Save or Save and Close button to complete the process.
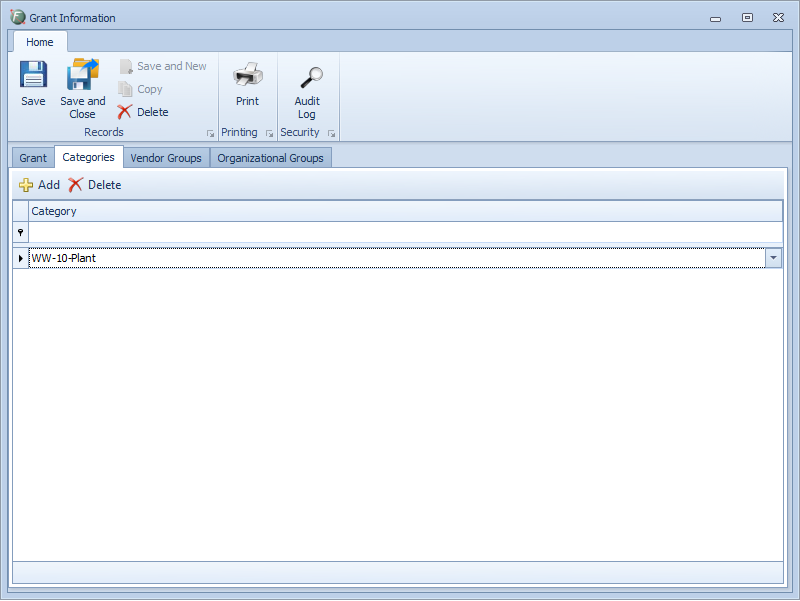
Chart of Accounts:
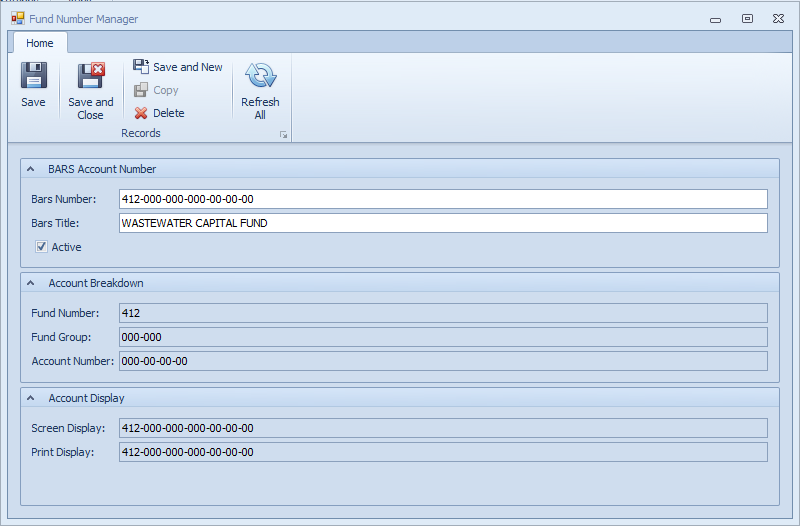
How To: - Manage Fund Numbers
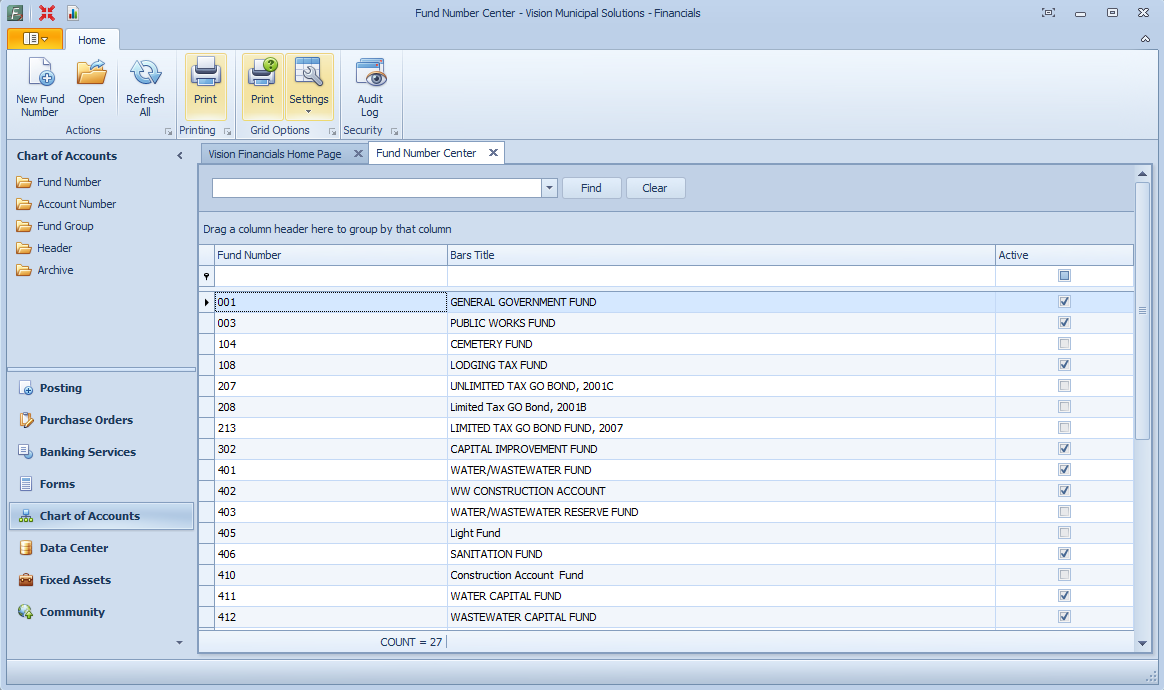
1) Begin by pressing the
New Fund Number Button in the upper-left hand corner of the Fund Number Center
2) You can also double click a fund number to edit it in the Fund Number Manager.
3) Make sure to press
Save or
Save and Close before closing the Manager.
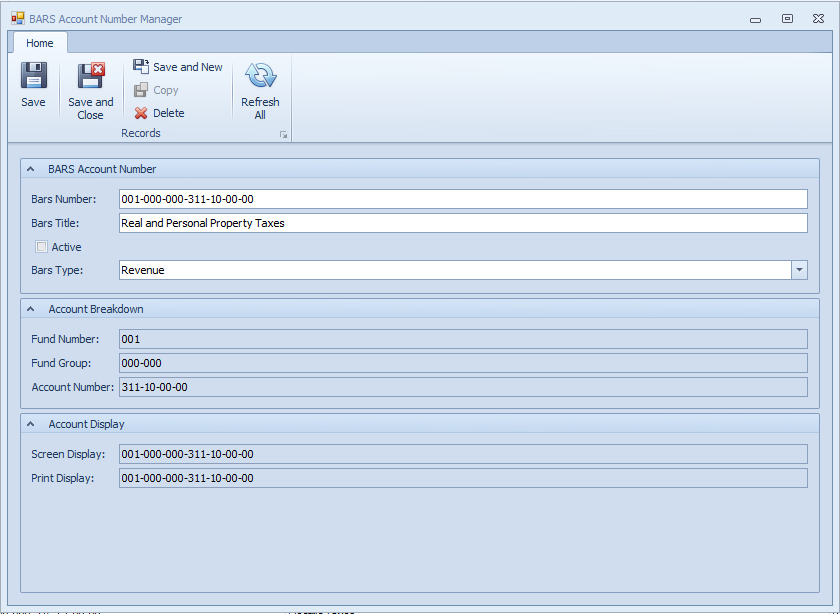
How To: - Manage BARS Account Numbers
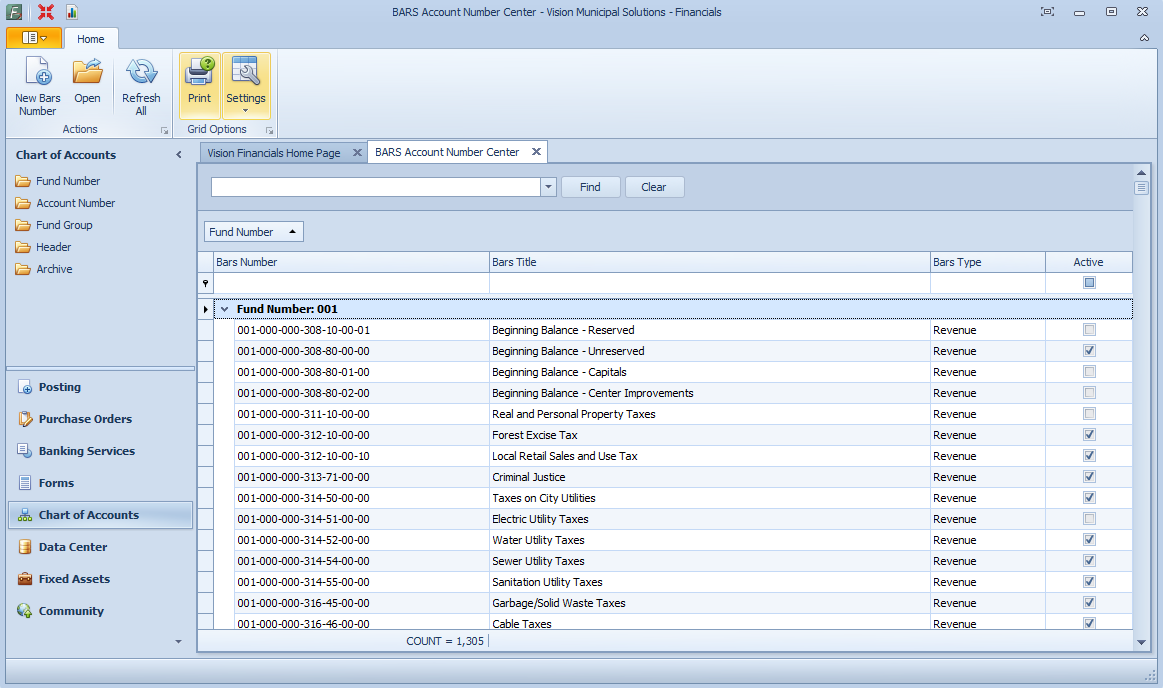
1) Begin by pressing the
New Bars Number Button in the upper-left hand corner of the BARS Account Number Center.
2) You can also double click a BARS Number Account to edit it in the BARS Account Number Manager.
3) Make sure to press
Save or
Save and Close before closing the manager.
How To: - Manage Funds Groups
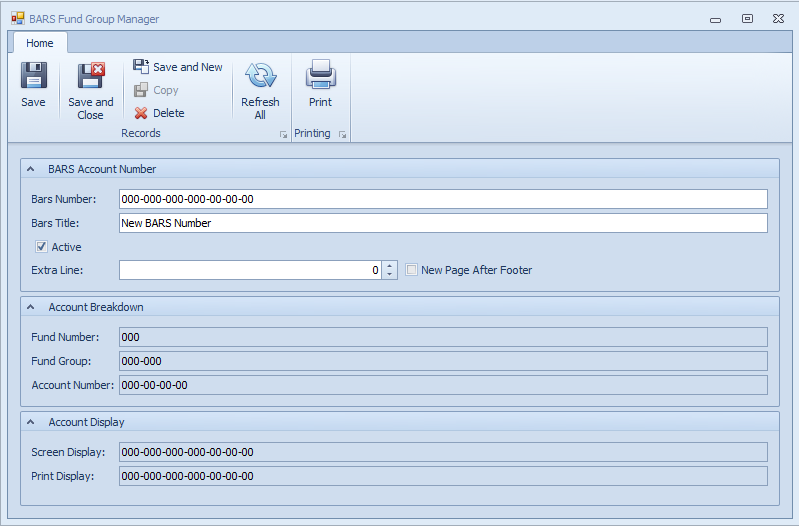
1) Begin by pressing the
New Fund Group Button in the upper-left hand corner of the BARS Fund Group Center
2) You can also double click a Fund Group to edit it in the BARS Fund Group Center.
3) Make sure to press
Save or
Save and Close before closing the Manager.
Workshops:
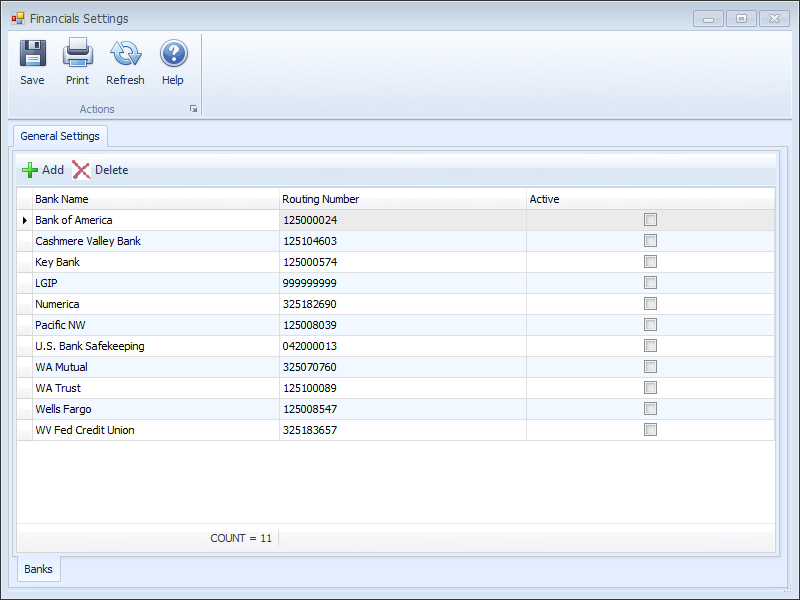
How To: - Setup a Bank or Investment Account
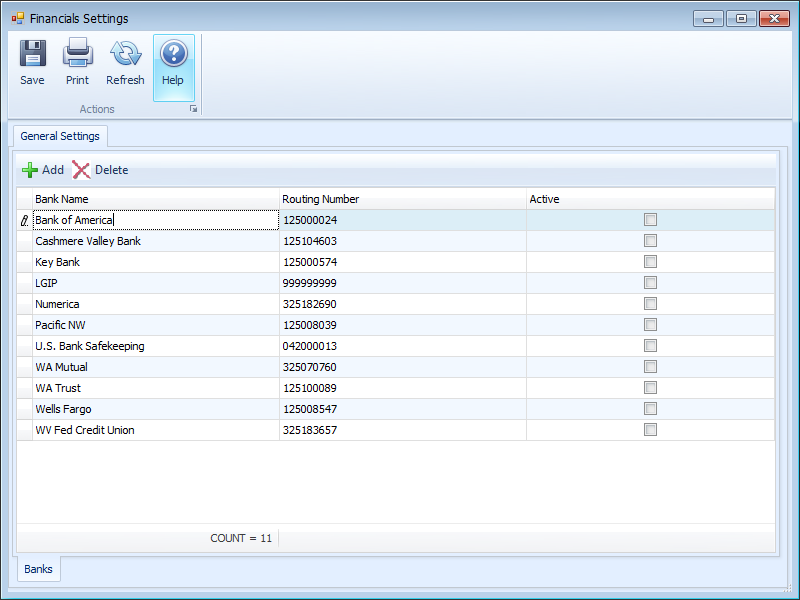
1) First, go to your top menu in Financials, click Home - Settings Wizard. Click Setup Financial Institutions and then click "Click here to Manage
Financial Institutions" on the right side of the screen.
2) Begin by selecting the
Add Button on the menu at the top of this screen.
3) Enter the Bank Name and Routing number of your new Institution.
4) If you wish to delete an institution, select it from the list and choose the
Delete Button.
5) Choose
Save and close. Close out of Settings Wizard.

6) Next Go to Data Center - view Vendors.
7) Select
YOUR Company from the vendor list, and click
Open at the top of the screen.
8) Click on the
Banking Tab at the top right of this screen.
9) Click the
Add button to add an account and choose an Institution from the list that you created in the Settings Wizard.
Note: This will automatically add your routing number.
10) Type in your Account Number in the field to the right, and choose the account type in the drop down selection.
11) Choose
Save and close.
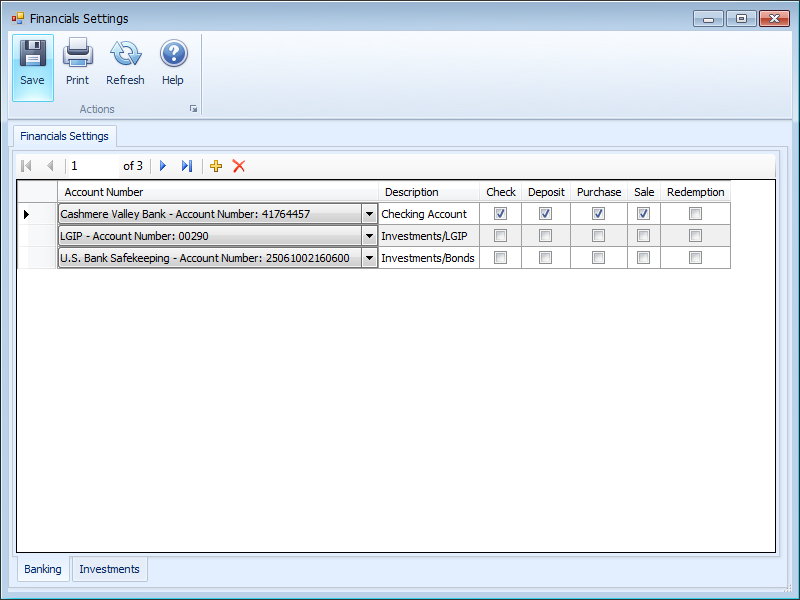
12) Continue by going back to your top menu in Financials, click Home - Settings Wizard. Click Banking Services and then click "Manage Banking
Services" on the right side of the screen.
13) Select the
New Button to add the account you created and select it from the drop down list.
14) Add a description of the account, and check any account types that you would like to set as default.
15) If the account is an investment account, click the investments tab at the bottom of the screen.
16) Click the
New Button to add the account and select it from the drop down list.
17) Add a description and select if it is a purchase and/or sale account.
18) Click
Save and close
How To: - Reconcile
1) Select Banking Services from Home menu.
2) Click New Reconciliation at top left of screen.
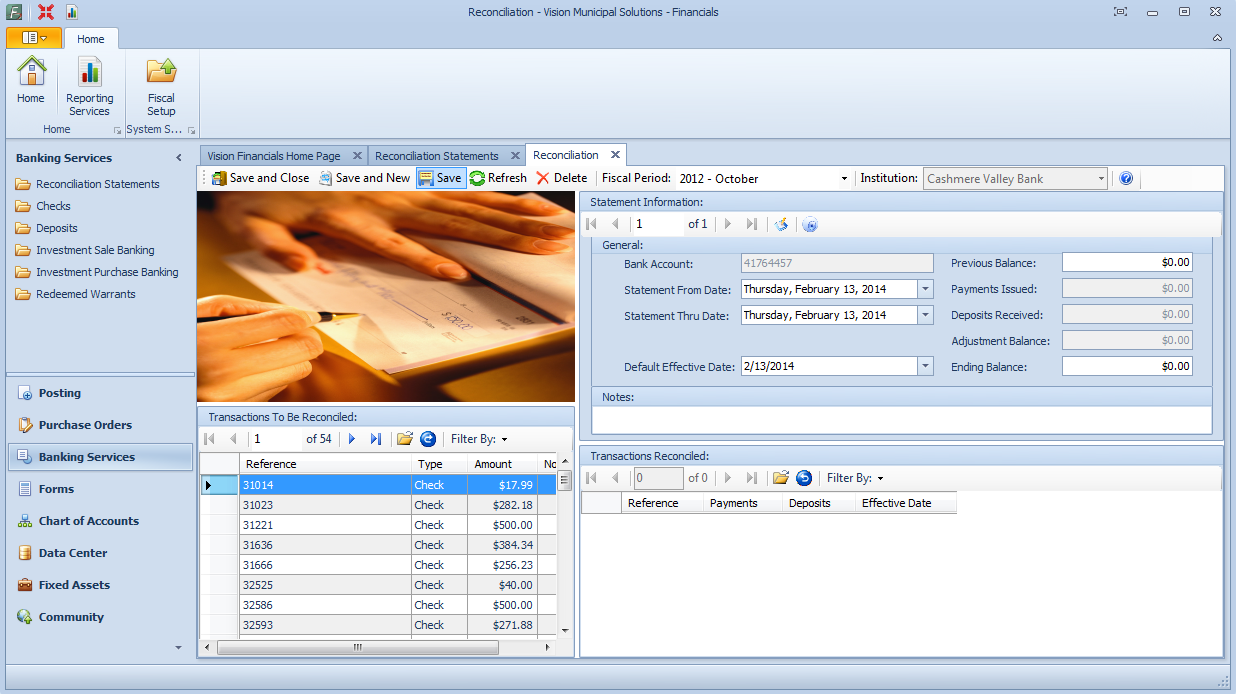
3) Select correct Fiscal Period and Institution at top of screen.
4) Answer Yes to Create a Statement with this Bank.
5) If there is more than one account for this institution, you will need to use the Statement Information tab to select the appropriate account.
6) Once the account is selected, un-reconciled transactions will appear in the lower left display.
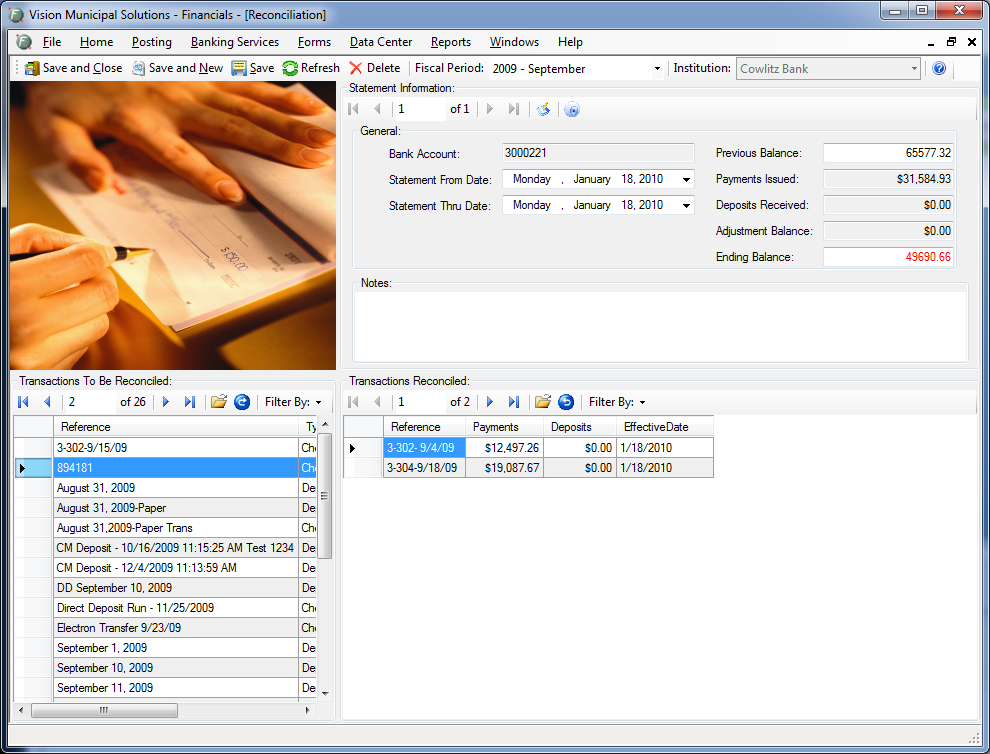
7) Enter your Previous and Ending balances from your bank statement for the system to verify "out of balance". (When you are out of balance, the
Ending Balance font color will be
RED. When you have balanced, the font color will change to BLACK.)
8) Double click on the transactions to be reconciled from the left hand panel which will move them to the reconciled section on the right. The system
will move them to the Transactions Reconciled column, and fill in the amount in the appropriate column above.
9) If there are any adjustments to be posted, there is a Post Bank Adjustments button below the Statement Information header.
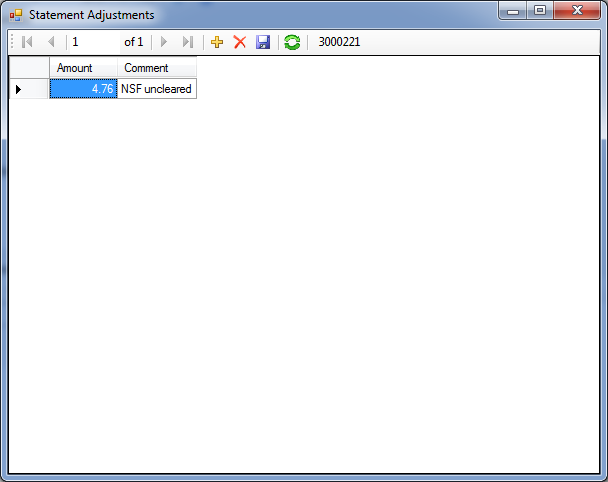
10) Select the plus to add a new adjustment, enter a positive or negative amount for the adjustment, add any comments you wish to add, and
click save. Then close the Statement Adjustments dialog box.
11) Reconciliation process can be saved at any time and finished later.
Are you in need of further help?
